Previously I blogged about the BBC micro:bit and my initial thoughts, BLOG LINK. I blogged, that I had purchased some and that I intended to use them with my secondary students, but I didn’t go into any further detail. Well, we are currently on school holidays and I am writing a program for my Year 9 Digital Technology students using the micro:bit.I am about half way through writing my program (which I will share once it is finished).
When writing my program, I am testing everything along the way. Why? Because when I was writing my program for my Year 7 students using TurtleArt, the recommended resources had errors with their code! I am guilty myself of once saying, “You don’t need to know much about new programs, provide students with the resources and learning activities, and they will run with it”. I was wrong and I take it back. You do need to be very familiar with the software/program you are using so that when there is a problem you can offer guidance or when you have a student who ‘smashes’ (slang for quickly completes) the activity, you can extend them with, I wonder would happen if… I wonder what you could do to…
So today, my goal was to build and code a simple milk carton robot by following instructions provided online, here is the LINK. Below is a video, looks simple doesn’t it?
For me, the robot was challenging for a number of reasons. The steps to build and code the robot can be found by following this LINK.
My challenges:
1. Sourcing the equipment
a) I already had the micro:bit Go pack Education Technology Specialists , I bought the following from Jaycar Electronics; packet alligator clips $11.95, 1 x servo micro for $9.95 and packet lead jumper PLG for $5.95.
b) Sourcing craft materials: I went to a Cheap as Chips shop
c) Sourcing milk carton: I went to the super market and bought a 600 ml chocolote milk container which my son happily drank
d) Approximate total cost per robot: Micro:bit pack – $22, electronics $12, craft $2 = $36
HOWEVER: Let students build their robots, display their robots and then break them apart. You can reuse all parts except for the craft, $2 loss per robot. Not bad 🙂
2. The code 😂
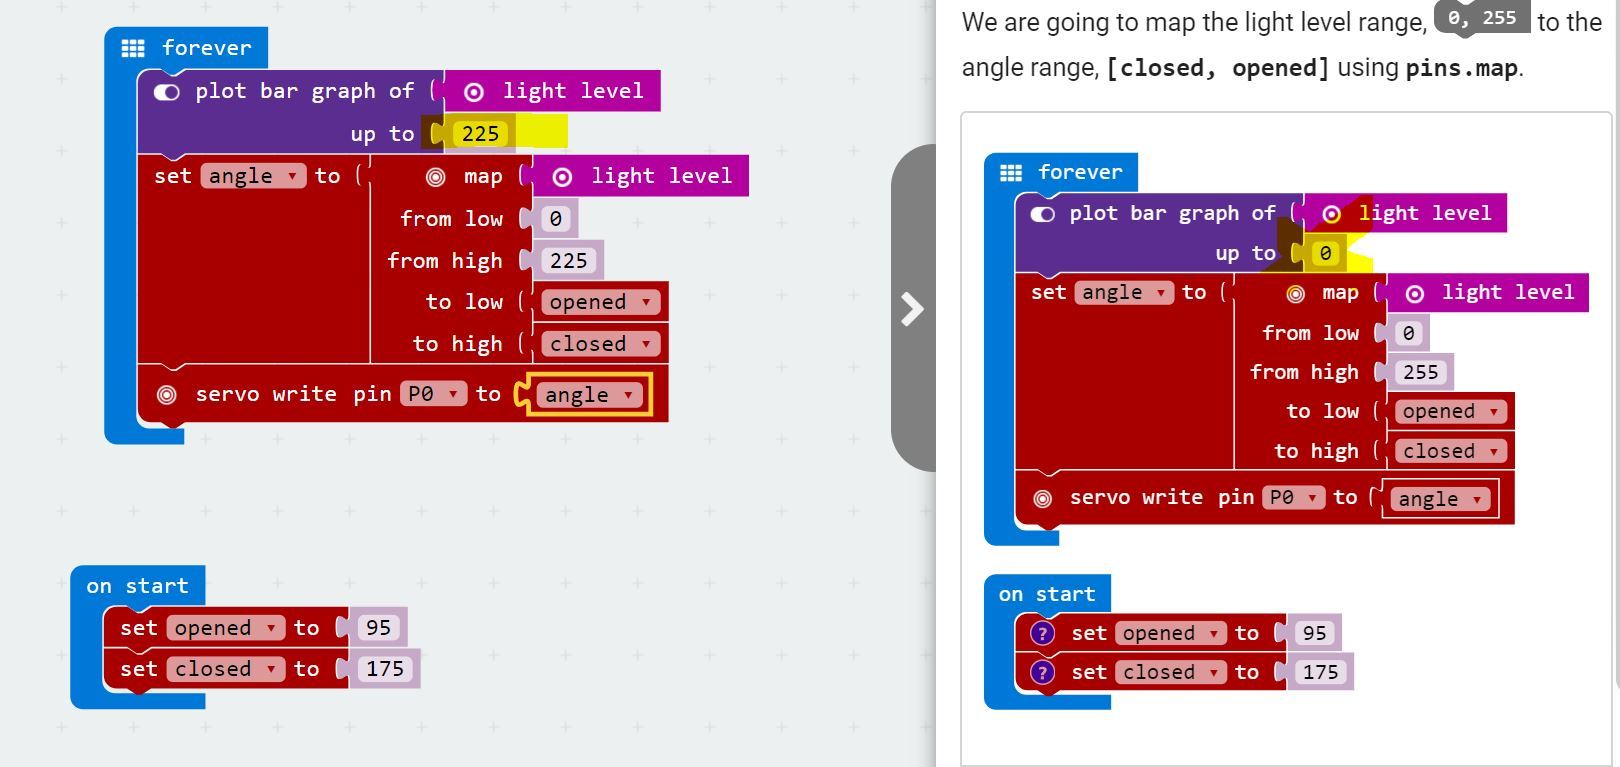
I downloaded the recommended code and it didn’t work.My husband said that the servo was trying to move but is seemed to moving both ways at the same time. He suggested that there was an error with the code. I played and he was correct. I have provided an image of the code below (click image to enlarge). The one to the left is mine, the one to the right is that which was provided by Microsoft. The difference in the code is the highlighted in yellow.
3. Connecting the wires
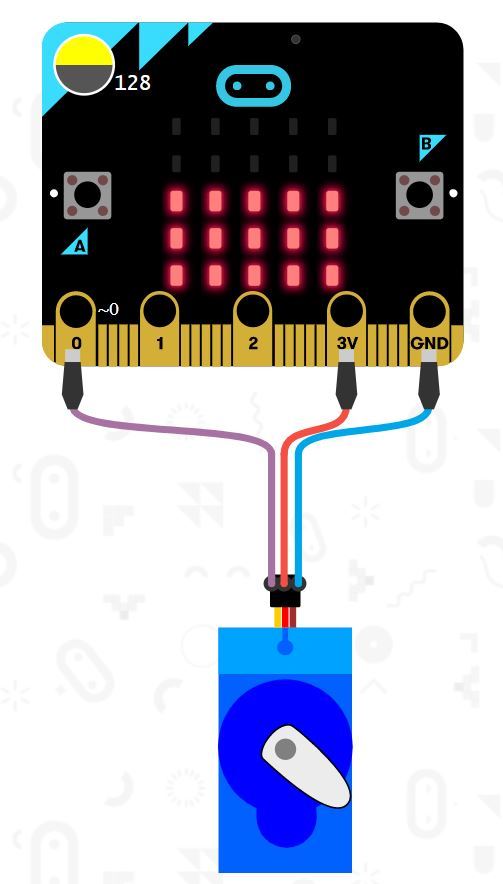
The video tutorial online wasn’t very clear online. My husband taught me this part. When you connect the alligator clips to the ports make sure you take note of the colours, match them up.
My success and Sydney (my daughter), decorated the robot: